If you’re a busy parent, these tech tips are for you! These are some of my favorite recent discoveries to save time, get organized, and just feel a little bit less stressed. I’ve got some variety for you, from individual features and functions to apps and tools that I love. And if you all find this helpful, I’ll keep adding to this list in the future!
Wrangle family scheduling
Create a calendar for every family member (& use it as your source of truth)
My first and most fundamental tech tip for parents is to fully commit yourself to Google Calendar, and to use it as your source of truth. When I say that, I mean everything has to go on the Google Calendar. If it’s not there, it doesn’t exist. That also means every device-wielding member of your family needs to be on board to share their calendars and consistently track all events in them.
Here’s how I recommend organizing your Google Calendar. I use a unique calendar and color for each of the following:
- One “whole family” calendar for events we’ll all attend
- My personal calendar, for appointments
- My husband’s personal calendar, which he owns and shares with me
- One for each of my kids. Actually, each kid has two calendars: one for “Weekdays” and one for “Evenings & Weekends”. That’s because my mom helps with childcare, and I share the weekday calendars with her so she has an eye on the kids’ schedules – but she doesn’t need every Saturday birthday and swim lesson clogging up her own calendar, so I keep the “evenings and weekends” portion separate.
- A “local events” calendar – this is something of a wishlist. If I see a cool event happening in our area that we may want to attend, I throw it on here. That way, if we have a free Saturday and are looking for something to do, we can check this calendar for ideas. It works great in conjunction with our family outings bucket list.
- I don’t usually keep this calendar visible. You can turn it off by unchecking the tick box next to it in your list of calendars.
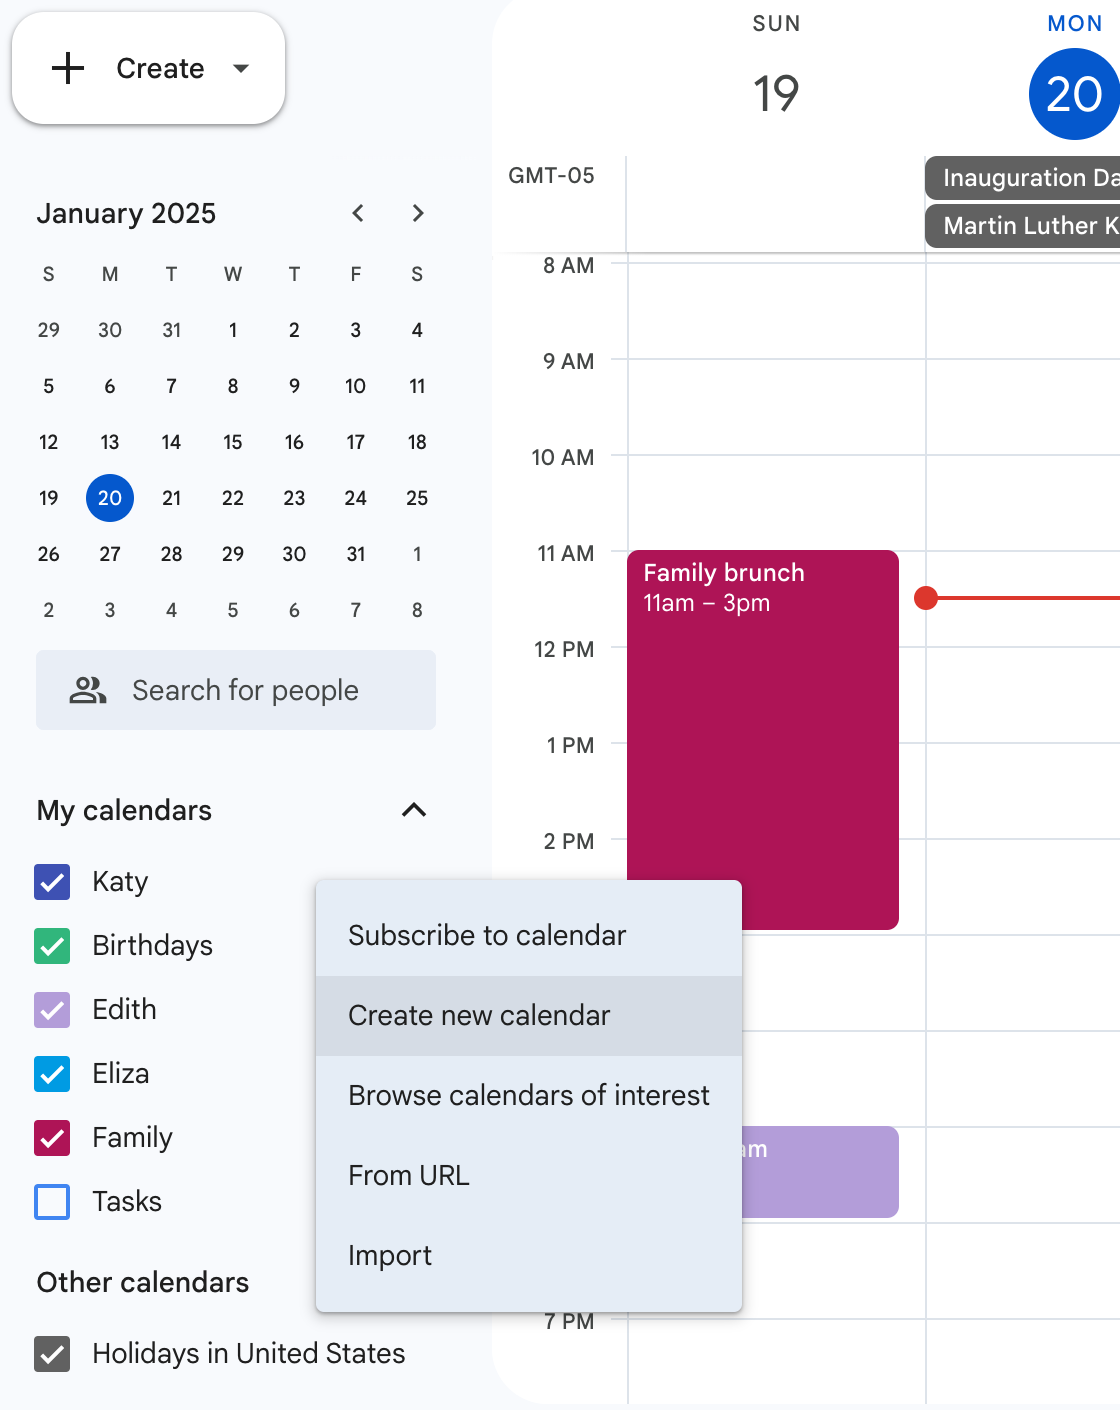
Here’s how to create a new calendar. You’ll need to do this in a web browser:
- On your computer, open Google Calendar.
- On the left, next to “Other calendars,” click Add other calendars > Create new calendar.
- Add a name and description for your calendar.
- Click Create calendar.
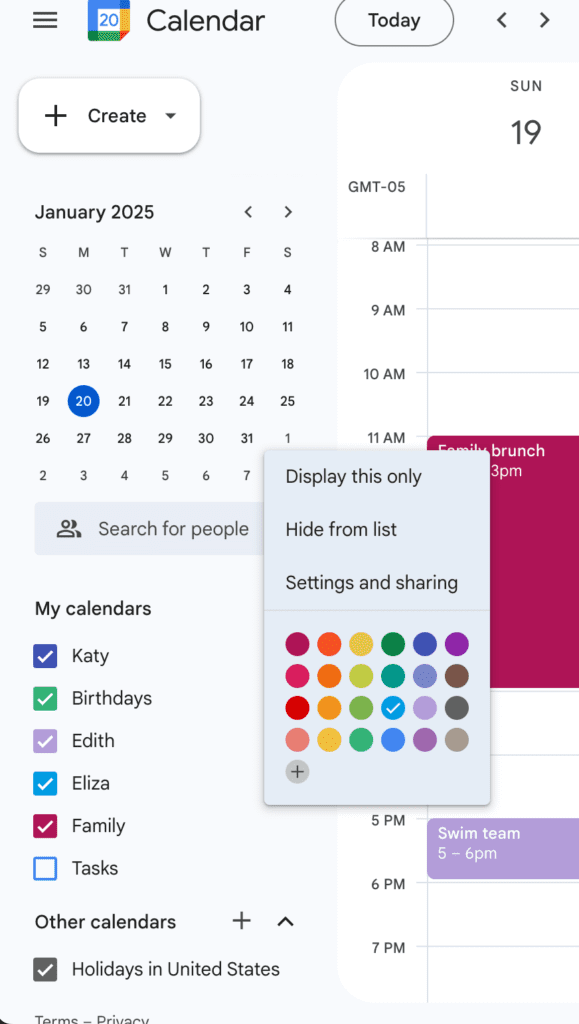
Here’s how to select a color:
- On the left side of the page, under “My calendars,” find your calendar.
- Next to your calendar, click Options
- Pick the color for your calendar. If you’re feeling a little extra, you can “add custom color” and select any hex code you like.
Add travel time for Google Calendar events
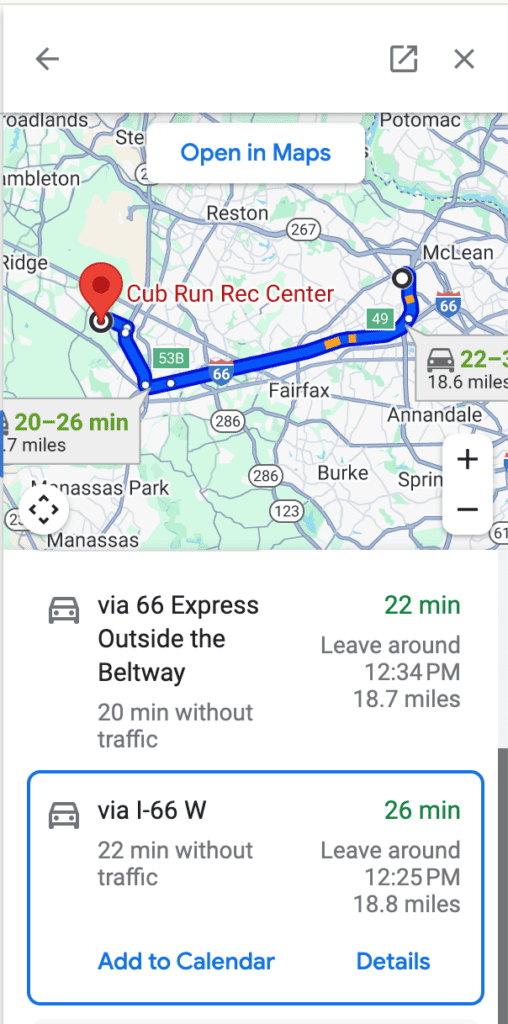
One Google Calendar tip that many folks don’t know about is that you can add travel time to events, which integrates with Google Maps to estimate driving or other travel time from your home or other starting point to your event. You can add this right to your calendar. This is useful for planning whether multiple events on your calendar are compatible; as well as determining which parent will drive which kid where.
Here’s how to add it:
- Open an event on your calendar. You need to do this on desktop, as it does not exist on mobile.
- Next to the address, click the map icon to “Preview in Maps”
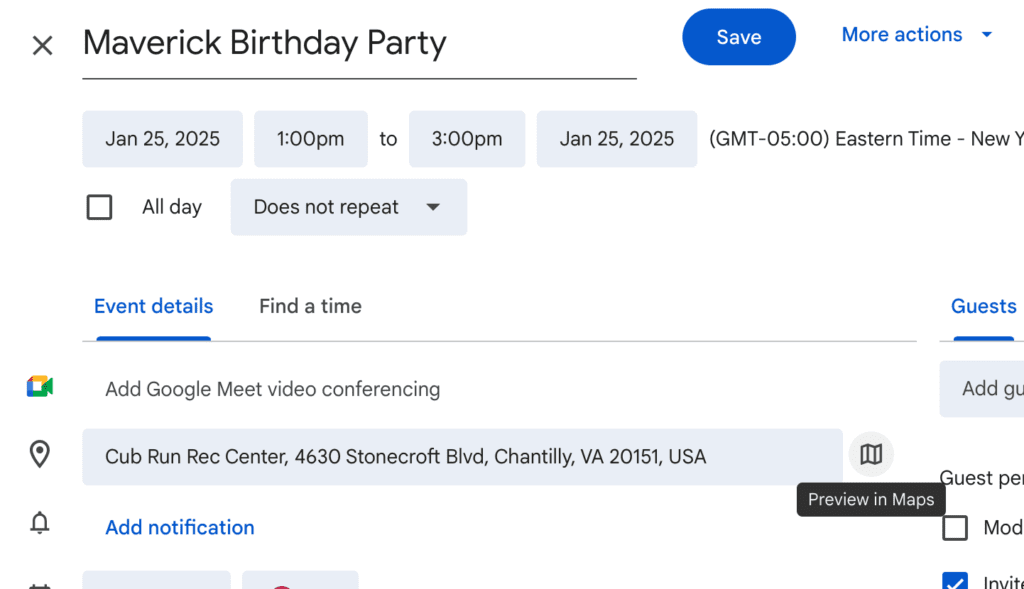
- In the Maps sidebar that opens up, add your starting point. Select a route.
- Click “add to calendar.” This will add an event to your default calendar, not necessarily the one you have open, so you may need to edit the travel time event to move it to the correct calendar.
Now, keep in mind that travel time can’t be added by default and must be added for each event. Personally, I use this feature for “out of the ordinary” events to get a better sense of our day, but not for recurring activities and lessons on our calendar. This is also a great feature to use when planning a trip or vacation itinerary.
Bulk upload Google Calendar events for your kids’ extracurriculars
At the beginning of the school year or sports season, it’s common to receive an unwieldy list of events for your kids’ extracurriculars or school holidays.
If the events are recurring – that is, the same time and place every week or in an otherwise predictable pattern – then you should create one event and using the recurring feature.
However, for things like sports or performance schedules, the timing and locations often vary. In that case, you can create events in bulk to add to your Google Calendar.
Here’s how to do it:
- Create a .csv file in Excel or create a Google Sheets doc that you will later export as a .csv.
- Create a header row to label your events. The first two of these are required, the rest are optional:
- Subject: (Required) The name of the event
Example: Swim Meet - Start Date: (Required) The day of the event, or first day if it is multiple days
Example: 06/28/2025 - Start Time: The time the event begins
Example: 8:00 AM - End Date: The last day of the event (or same day if it is a one-day event)
Example: 06/28/2025 - End Time: The time the event ends
Example: 12:00 PM - All Day Event: Whether the event is an all-day event.
- If it’s an all-day event, enter True.
- If it isn’t an all-day event, enter False.
Example: False
- Description: Description or notes about the event
Example: “A meet. Check lineup to see events swimming.” - Location: The location for the event
Example: “Liberty Tree Pool, 1234 Main Street” - Private: Whether the event should be marked private.
- If it’s private, enter True.
- If it isn’t private, enter False.
Example: True
- Subject: (Required) The name of the event
- Then, add all of your events as rows in your spreadsheet. If you’re working in Google Sheets, then export your file as a .csv.
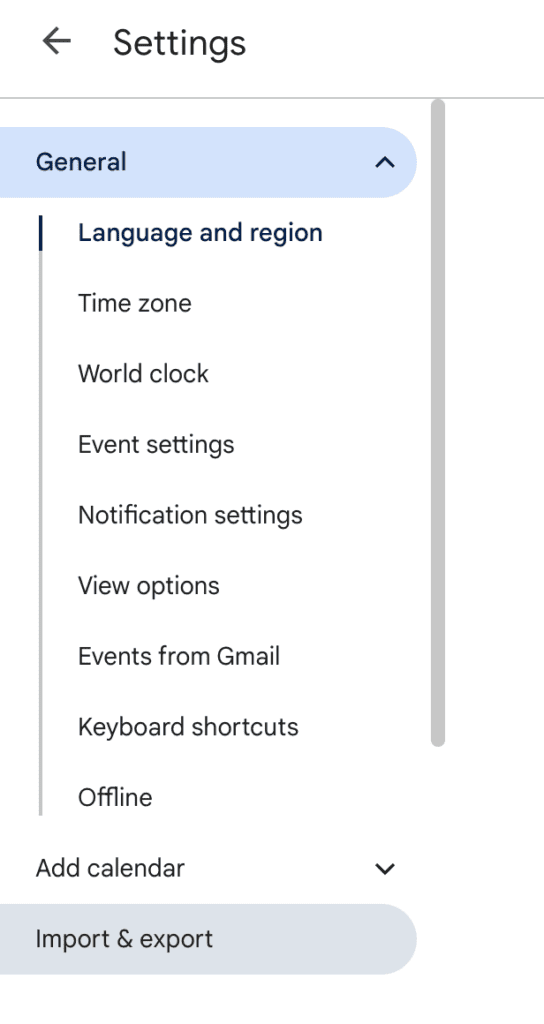
- Open Google Calendar, click Settings, and click “Import & Export”
- Select your .csv file and the calendar you want to add the events to.
This is a simple way to get that whole school year or season on the calendar. Also check out the shortcut method at the bottom of this post to save even more time.
Add these 27 items to your calendar now to avoid lass-minute stress
It pays to plan ahead, so you don’t end up double-booking yourself and so you can plan with holidays, deadlines, school dates, civic dates, and more in mind. Check out this list of 27 things to add to your calendar now for an organized year.
Overall, these are my top suggestions regarding calendar organization, but check out a few more in this post about 5 Google Calendar hacks.
Get there on time with Google Maps (and know where “there” is)
Have Google Maps remind you to leave on time based on traffic
Getting out the door is an eternal struggle when you have kids. One way to help is to get a notification based on current traffic conditions that tells you when to leave on time.
Here’s how to set up a reminder for later:
- Open Google Maps and select the starting and ending locations of your drive
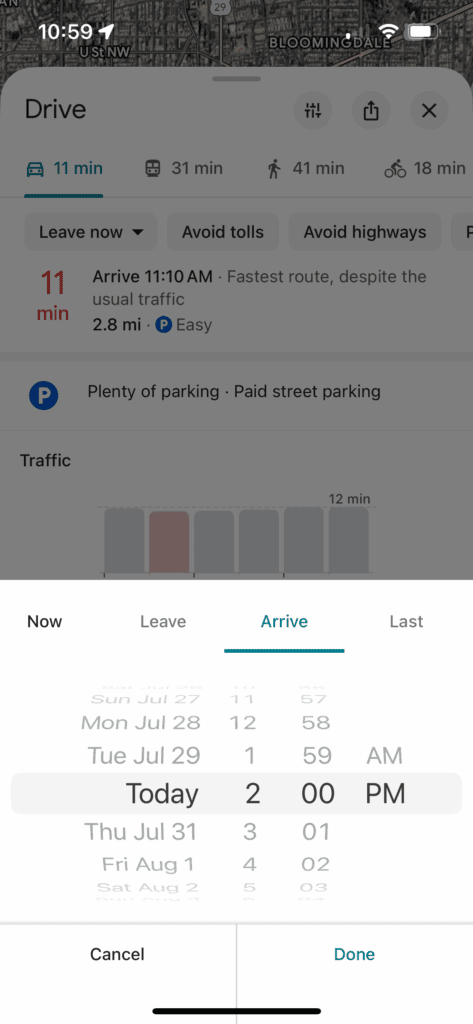
- Swipe up expand the drive menu, then tap “Leave now”
- Tap “Arrive” to select the time you want to arrive and then select your arrival time. I make this time 5 or 10 minutes before my event starts to build in time for parking, unbuckling car seats, and transporting children whose legs have spontaneously stopped working.
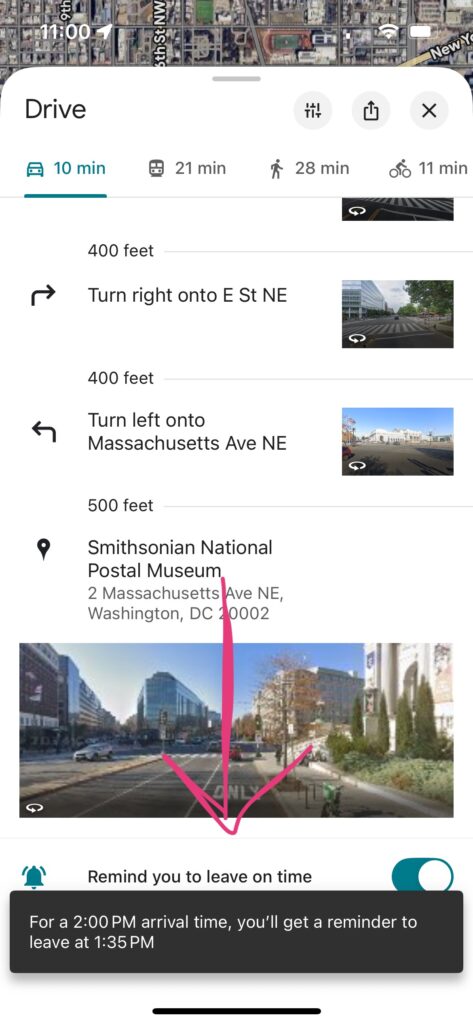
- Scroll down and toggle “Remind you to leave on time”. Google will tell you what time the reminder will be sent.
Save your parking location when you get out of your car
Ever park in an unfamiliar location in the city and forget where you left your car? Or, never done this, but always nervous the nefarious effects of mom brain will make you? Google Maps can remember your parking spot for you.
Here’s how to save your parking location when you arrive:
- When you reach your destination, open Google Maps
- Tap the blue dot that shows your current location
- Tap “Save parking”
- You can tap “Share” to send this to others or even text it to yourself
Later, to find your parked car:
- Reopen Google Maps
- Look for the gray icon that says “You parked here”
- You can now use directions to navigate to that location
- Or, if you texted yourself the link earlier, just use that
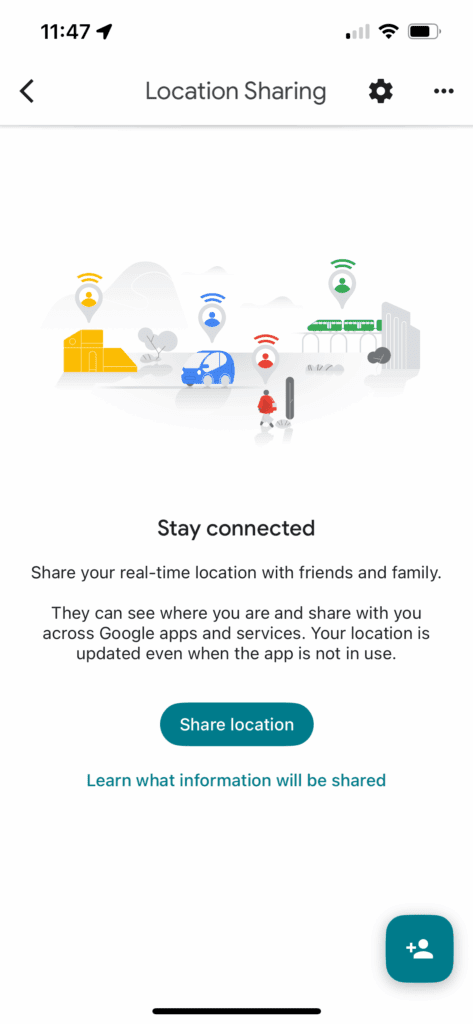
Google Maps offers the ability to share your live, real-time location with others, which is helpful when you are trying to coordinate with your partner to let them know where you are or when you’ll be home. You can choose who can find your location and how long you share it in Google Maps.
Be aware that when you share your location with someone, they will be able to see: your name and photo, your device’s recent location even when Google apps aren’t being used; the device’s battery power and if it’s charging; arrival and departure time if they add a Location Sharing notification.
Here’s how to share your location:
- Open the Google Maps app
- Tap your profile picture, select Location sharing, and tap “Share location”
- Choose how long you want to share your location
- Tap the person with whom you want to share your location
If you want to share your estimated time of arrival:
- Open the Google Maps app
- Set a destination and begin navigation
- Tap Share trip progress
- Tap the person you want to share it with and tap Share
- It will stop sharing once you arrive at your destination, or you can choose to stop sharing earlier
Check out more Google Maps features that most people don’t know!
Texting & calling tips for when you’re busy
Schedule text messages to send later
Sometimes you want to send a text, but not have it delivered right away. For parents, perhaps you’re catching up on texts after the kids go to bed and you don’t want to disturb folks with a midnight ping. Or maybe you want to schedule a happy birthday text so you don’t forget. There are a bunch of reasons. Luckily, Apple added the ability to schedule a text message in late 2024.
Here’s how to schedule a message.
- Open the messages app and type a new message
- Tap the
 to the left of the text window, and select Send Later
 - Pick the time. You can schedule messages up to 2 weeks into the future
- Click send

Boom! Your message is scheduled. Once it’s scheduled, you will see the word “edit” hovering over the message. This allows you to send the message now, edit the time, or delete the message.
Block unknown callers
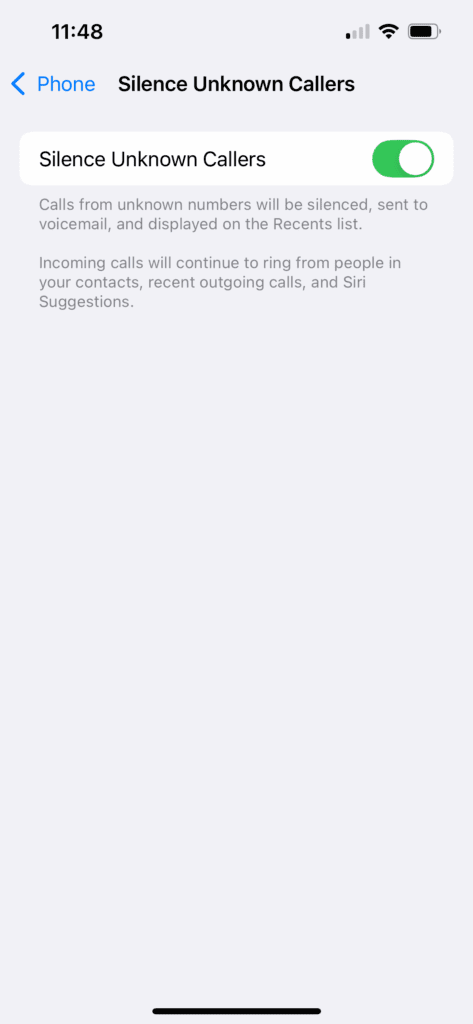
Your phone ringing when you’re trying to wrangle pants on your toddler is annoying enough. Your phone ringing with nothing more than a spam call can be the thing that puts you over the edge in a tough moment! Cut down on interruptions by automatically sending calls from unknown callers directly to voicemail. Just be sure to check your voicemail and/or save contacts like your kids’ school and doctors offices to your contacts so you don’t miss anything important. To turn on this feature:
- Go to Settings > Apps > Phone
- Tap “Silence Unknown Callers” and enable to silence calls from unknown numbers. The call will be sent to voicemail, and you will be able to see it on your recent calls list. Calls will continue to ring from people in your contacts, recent outgoing calls, and Siri Suggestions.
- Or, tap “Call Blocking & Identification” to turn on Silence Junk Callers (available with some carriers) to silence calls identified by your carrier as potential spam or fraud.

I typically have this setting turned on, but if I’m expecting a call from an unknown number, like the auto repair garage, I will turn the setting off.
Record and transcribe calls
For important phone calls with content you want to remember, such as a phone call with a school official or doctor’s office, it can be so helpful to record and transcribe the contents into writing. This also helps with distraction-proofing from interrupting kids or forgetful mom brain. Of course, do make sure that the other participant is willing to be recorded.
To record a call:
- During a call, tap
 . Both call participants will hear an audio notice that the call is being recorded.
 - To stop recording, tap
 or hang up. Call recordings are automatically saved to a Call Recordings folder in the Notes app.
 - To see the call in the Notes app, tap View Saved Call.
Use these apps as a second brain
Use your Reminders app for time-based to-dos
Feeling overwhelmed? You may be trying to remember to do too much stuff! You need to clear out your brain so you can focus…and still remember to, you know, do the stuff. The best app I’ve found to help is also one that’s already installed for Apple users: the iPhone Reminders app. At its core, Reminders is best at setting up notifications to do things at a certain day and time. My favorite thing about using the Reminders app as opposed to an alarm at a certain time is that the reminder persists on your home screen until you check it off. Reminders is great for:
- Remembering to do something at a certain day and time, such as bringing paperwork with you to an appointment or starting your slow cooker in the morning
- Recurring reminders, such as a daily notification to take a morning vitamin or a weekly notification to bring the recycling to the curb
- Reminders by location, such as a reminder to change the laundry when you arrive at your home address, or to bring a box of borrowed dishes inside when you arrive at your mother-in-law’s house (true story!)
Reminders also has some recently added functionality that you may not be familiar with. Learn more, plus my top suggestions for how to lighten your mental load with Reminders.
Use your Notes app for everything else
After you set those Reminders, use the Notes app on your phone for everything else. I recommend creating notes for gift ideas, shopping lists, and routines. I have one for the last date I swapped out my contact lenses, and another where I write down the names of kids and parents from our swim team (so many to learn!) Here are the top 5 notes to create right now to clear up mental space.
Streamline everyday tasks
Use Apple pay for contactless payments
Just like credit cards can be used to “tap to pay” for in-person payments where you see symbols like this, your iPhone can be used too:

This seems somewhat ubiquitous, so you may already be using or familiar with this feature. However, my mom was delighted to see me pay this way at a store and asked me to show her how, so I’m going to include it on this list! I was also recently relieved to have this option when I arrived at the grocery store only to realize I’d forgotten my purse – no worries, I used Apple pay to buy my groceries and went on my merry way.
First, you’ll need to have Apple Pay set up with a credit, debit, or prepaid card. Then when it comes time to pay, double-click the side button on your phone and authenticate with Face ID or your passcode. Hold the top of your iPhone near the card reader until you see Done or a checkmark on the screen. If your model of iPhone has Touch ID instead of Face ID, rest your finger on Touch ID and hold your phone near the card reader instead.
You can also pay with a different card instead of your default card. When you’re paying and your default card appears, tap it, then choose another card and continue as above.
Freeze your screen to a single app when you let your kid use it
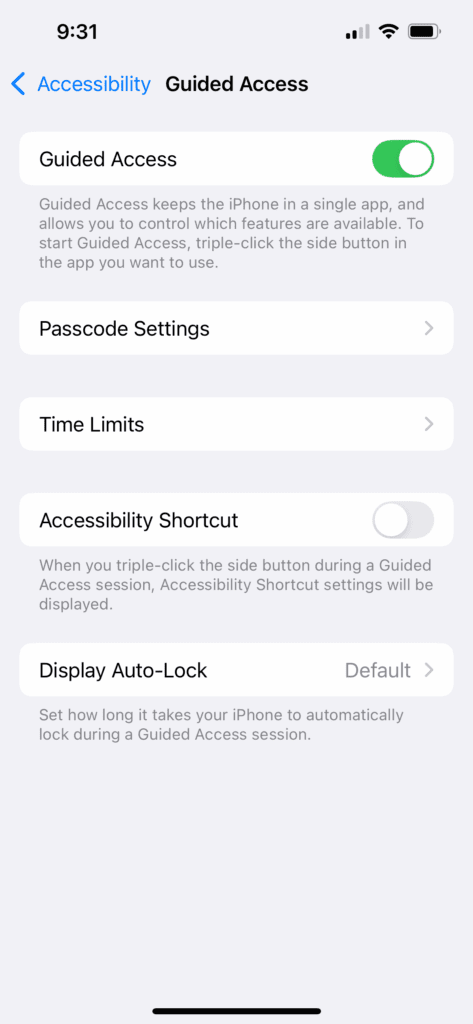
I wish I’d known about this when my youngest child was a toddler! With iPhone’s “Guided Access” function, you can temporarily keep your phone frozen on a single app, so that you can show someone something without them swiping away…or keep a toddler busy with a game while you’re using a public restroom without them opening Amazon and ordering “American Hustle” (I’m sure I don’t have to tell you why this example is so oddly specific.) You can even use this feature to keep yourself on task when you have work to do in a single app and want to prevent yourself from switching to others.
To set up Guided Access as an option:
- Go to Settings > Accessibility > Guided Access, and turn on Guided Access.
- Set up any additional settings, such as ending the session with a passcode or Face ID; setting an alarm to go off before the Guided Access time ends; and setting the auto-lock time during a Guided Access session.
To start a Guided Access session:
- Open the app you want to use
- Turn on Guided Access by:
- Asking Siri something like “Turn on Guided Access”
- Using the Control Center (swipe down from top of screen) if you’ve added Guided Access there
- Triple-click the side button to use the Accessibility Shortcut. You’ll see a pop-up with the Accessibility features you have turned on. (Unless Guided Access is the only one you’ve turned on.)
- Circle any areas of the screen you want to disabled
- Tap Options to turn on or off the side button, volume buttons, motion (to prevent iPhone from switching from portrait to landscape for example), software keyboards, touch, and/or time limit.
- Tap Start.
To end a Guided Access session:
- Use passcode: If you set up passcode when you set up Guided Access, triple-tap the side button and enter the Guided Access passcode. If you didn’t set a Guided Access passcode, enter your iPhone passcode.
- Use Face ID or Touch ID: If you turned on the Face ID or Touch ID option in Guided Access Passcode Settings, double-click the side button, then unlock your iPhone with Face ID or Touch ID.
Plan ahead with specialized planners
Use a digital planner to create your family’s perfect summer camp schedule
Creating a summer camp schedule for your family has become a logistical burden on many parents. Images of setting alarms for registration times and frantically filling out forms to get a spot come to mind. Or of mad-scientist red-string-mapping to figure out how you’re going to get kids one, two, and three to places A, B, and C, all at the same time.
Whether you’re a working parent trying to schedule care for your kids while school’s out, a stay-at-home parent interested in providing enrichment to your child on a budget, or somewhere in between, finding the right camps and creating a schedule that works for your family is stressful and complicated. The challenges only get exponentially harder the more children you have.
To help organize camp ideas, which were available which weeks, and registration tasks, I created this summer camp planner for parents Notion template. I actually originally created this just for me and my husband to plan camps for our two children, and the planning process was so painless…and actually fun!
The template helps you:
- Research camp options, include cost, theme, distance to your home, and more
- Make a plan for which child will go to which camp, which weeks
- Track registrations, important forms, and expenses
I’ve created this in Notion – however, if you would like this in a different platform, I will consider requests! Leave a comment or shoot me a message. My name is Katy 😊. Grab your copy of the summer camp planner for parents and I hope you’ll have your most organized summer ever!
Use a digital planner to schedule extracurricular activities
After I made the summer camp planner, I tackled planning my family’s extracurricular schedule.
Before you start signing up for things, it’s helpful to think about what you value in an extracurricular activity as well as the logistical requirements for your family: here’s a guide.
Then, use this Extracurricular Activities Planner Notion Template to research activity options, make a plan, and track registrations and expenses. As with the summer camp planner, this is in Notion, but I do take requests if you’re interested in a different format. Please reach out.
Use a planner for meal planning
The last thing you need on busy school nights is to figure out what’s for dinner. I have meal planned for years, and it has absolutely freed up mental space and stress.
Here’s my process, using this template in Notion. The template includes a recipe generator, kitchen inventory, a shopping list that you can pull up in the grocery store, and a calendar-based meal plan that you can use weekly or monthly, however makes sense to you.
Here’s what I recommend:
- Update your kitchen inventory to reflect what you have in your kitchen right now. This will take some legwork the first time, but is easy to maintain after that.
- Use the recipe generator to suggest meals with what you have on hand. Use these in your meal plan.
- Fill in the gaps in your meal plan to cover breakfast, school lunches lunch, dinner, and snacks. Include leftover nights, or if that’s unappealing to you then rebrand it to “prepped meal” nights or “smorgasboard” nights. Additionally, leave space in your plan to freestyle with whatever uncooked ingredients are left. I typically plan 4-5 nights of cooking, one night of a snack dinner with a movie, and 1-2 nights of using up whatever’s left in the kitchen, whether it’s already cooked or an ingredient. You can also build in efficiencies, like having the same side dishes with different main dishes.
- Add ingredients to your shopping list and then head to the store.
You can grab your copy of the template here.
Use a planner for Christmas shopping planning
Some say that a Christmas to-do list takes the magic out of the season. I disagree.
If you’re the primary planner for all things Christmas in your household, you know it can get overwhelming. You look at those twinkling lights and instead of sugar plums dancing in your head, you’re seeing all the presents you need to wrap, the snacks you need to send to school, and the stack of cards on your counter waiting to be addressed. I get it. It’s a lot!
A calendar and to-do list can help make this happen! Get those swirling thoughts out of your head and put them in your digital planner. Even if they’re not done yet, you’ll feel at peace when there’s a plan. Here’s a Notion template I created for Christmas planning that covers the primary things you should be thinking about, with dates and the ability to share with a partner.
Keep a running list of family outing ideas to spend quality time together
Lastly, let’s make sure we make space to spend time together as a family. With a little planning ahead, you can avoid the Saturday-morning drag of “what are we going to do today” and maybe even “why is it taking us two hours to get out the door”, and set yourself up for a day of fun and togetherness. Keep a list of ideas you’re considering – for example, parks and museums you’d like to visit. I made a Notion template to make this easy, so you can filter for indoor vs. outdoor activities; free vs. paid activities; activities that you’ve never done before; and activities that don’t require reservations. You can grab a copy here.
Plus, get your list started with these 99 ideas.
What other parenting challenges would you like to see solved with better tech?